

These are photos of the PicBox V1.0 (The prototype)
These photos were taken at different step the developpement
Some of them were just done to precise you the type of tools
you need to manage the project until the end.
Click on the picture to scale them, take care of the sizes of
the big images even if they are compressed.
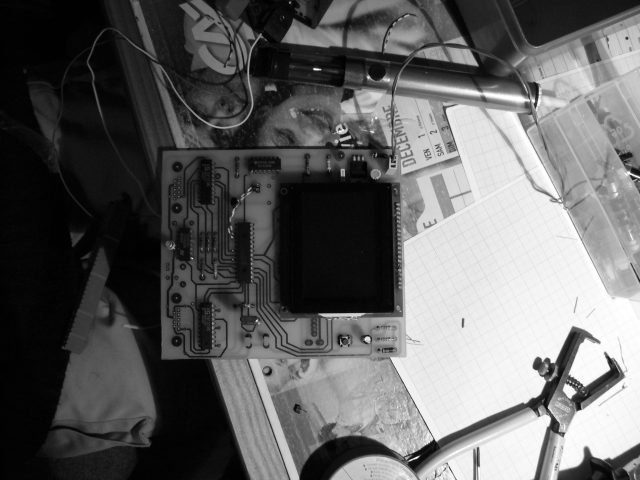
The two faces of the original PCB ( bugged ! ) :


Even the texts are upside down !
These PCBs are preliminary, don't try to reproduce them
they will not work without modifications.
What you need to have to do the construction :


A good soldering unit and some tin are not enough to achieve,
you also need to have good and effective grips and a multimeter
to test the continuity of the traces and try to find possible
mistakes. The unsoldering pomp is recomendated.
The components kit (cleanly stored)

The list of the components needed is available at the hardware section,
it's valid for both versions (1 or 2 soonly present on the site).
Don't make a false buy ! Purchase only the referencies given
even if someone tells you that there is other ones compatible.
Don't worry you don't risk anything excepting over-heating or over-
consumption or else a bad working state.
The final working prototype :


Well ! After longs hours of intoxicating my self with tin vapors,
on my desktop, in my bedroom, between school and exams, the prototype
start to work, one lucky week, and I quickly make a base PicLib
in C. It's not completed for now.
Don't discourage yourself if your work doesn't work the first time you
you give him power or works partially. Be patient, use the multimeter and
play the detective ! If you are not strong skilled in electronic prefer
use a 9V batterie to enpower the system during the building process to
avoid burning fragile components.
It's my first application, I may have made mistakes not finded for
the moment.
Electronic experts, don't hesitate to advice me, I'm a novice.
Give us upgrades and tips, someones may need it.
All remarks are welcome !
The main parts of the hardware :


In the right order :
Audio : 2N2222 Transistor and LM324N ampli-op.
Alim : 7805 power regulator and the required capacitors,
try to power the system with any source of current
(values comprised between 5V-15V).
Cpu + Clock : The game machine brain.
Pads : Nothing egual a 74xx373 interface designed for
AMIGA's and ATARI's game pads. Find them in your attic
or at a secondhand trade.
Run fast to your favorite electronic store and buy all !
There is for aproximatively thirty euros (~ 35 us$) !
Back to the home
Be carefull : this site is under construction !

Click on the picture to scale them, take care of the sizes of the big images even if they are compressed.
The two faces of the original PCB ( bugged ! ) :
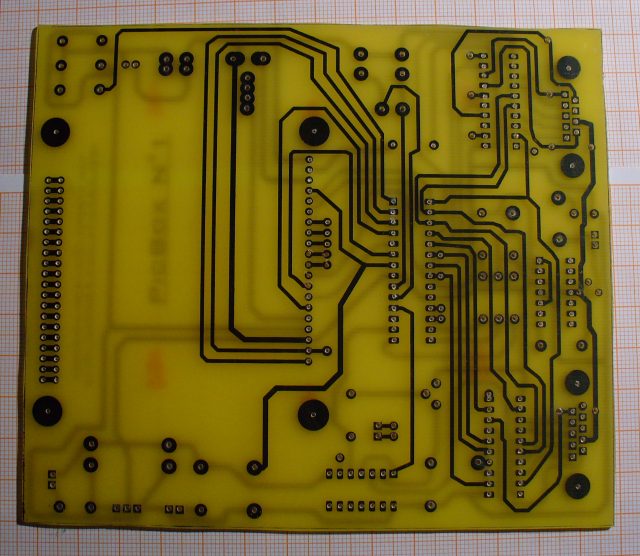
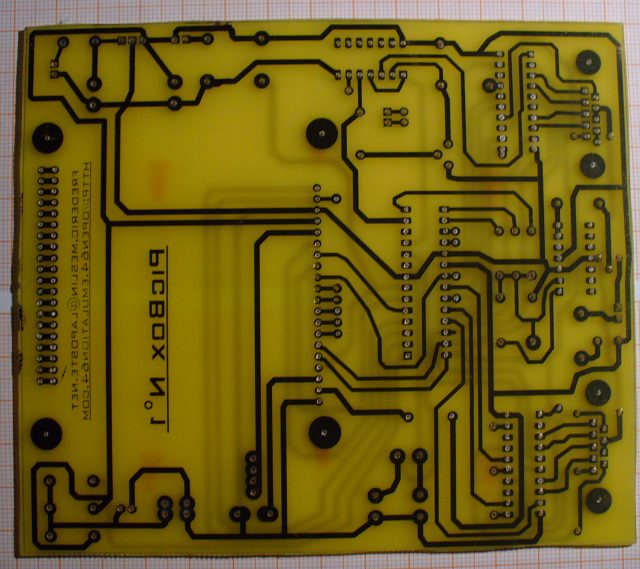
Even the texts are upside down !
These PCBs are preliminary, don't try to reproduce them they will not work without modifications.
What you need to have to do the construction :
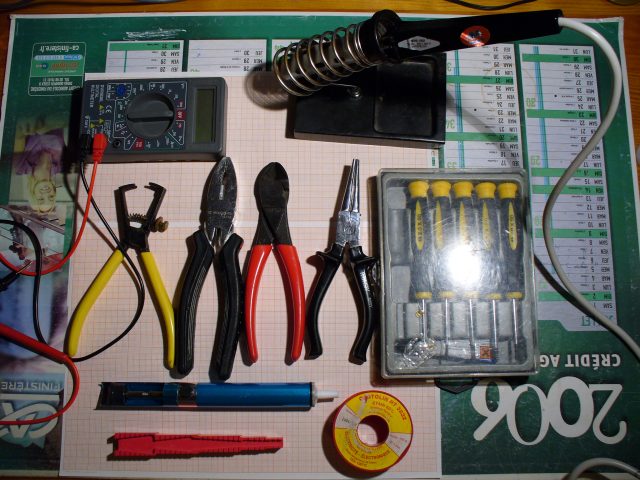

A good soldering unit and some tin are not enough to achieve, you also need to have good and effective grips and a multimeter to test the continuity of the traces and try to find possible mistakes. The unsoldering pomp is recomendated.
The components kit (cleanly stored)
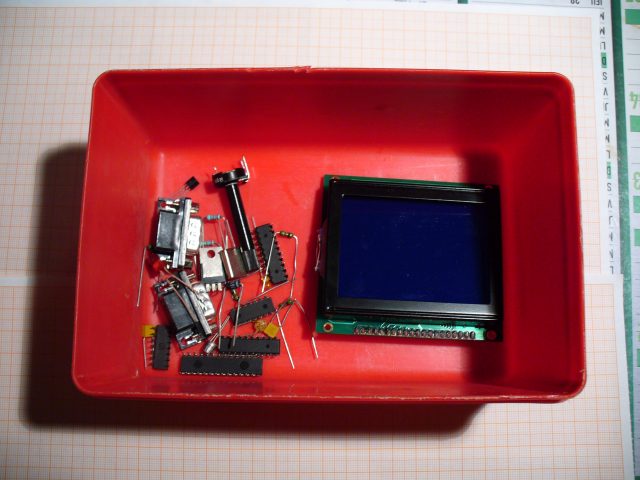
The list of the components needed is available at the hardware section, it's valid for both versions (1 or 2 soonly present on the site).
Don't make a false buy ! Purchase only the referencies given even if someone tells you that there is other ones compatible. Don't worry you don't risk anything excepting over-heating or over- consumption or else a bad working state.
The final working prototype :
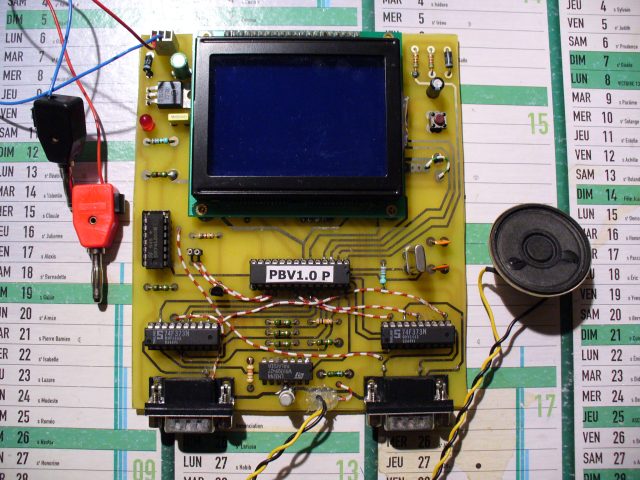

Well ! After longs hours of intoxicating my self with tin vapors, on my desktop, in my bedroom, between school and exams, the prototype start to work, one lucky week, and I quickly make a base PicLib in C. It's not completed for now.
Don't discourage yourself if your work doesn't work the first time you you give him power or works partially. Be patient, use the multimeter and play the detective ! If you are not strong skilled in electronic prefer use a 9V batterie to enpower the system during the building process to avoid burning fragile components.
It's my first application, I may have made mistakes not finded for the moment.
Electronic experts, don't hesitate to advice me, I'm a novice. Give us upgrades and tips, someones may need it. All remarks are welcome !
The main parts of the hardware :
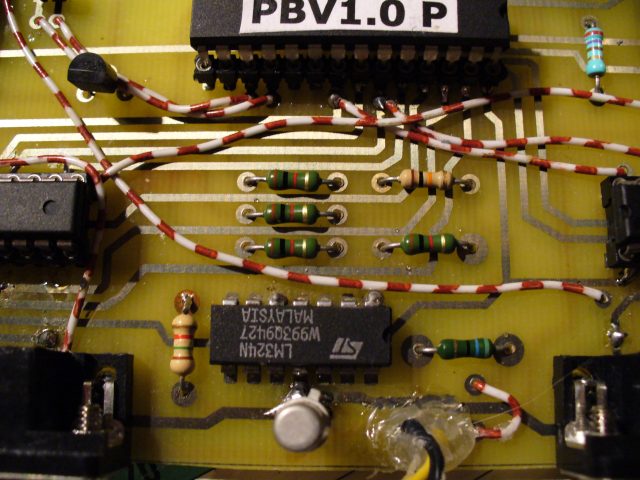
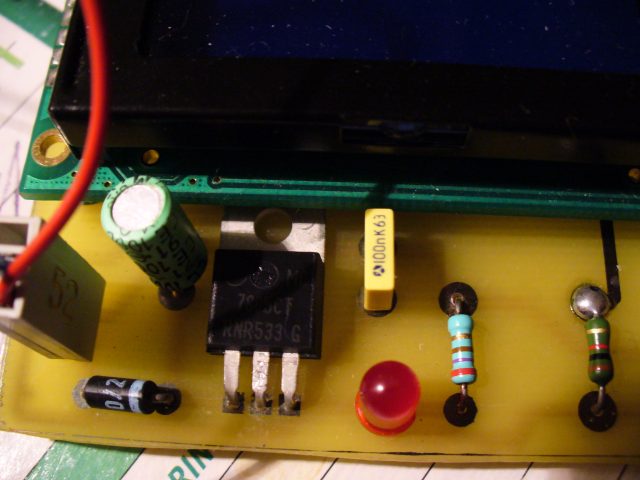
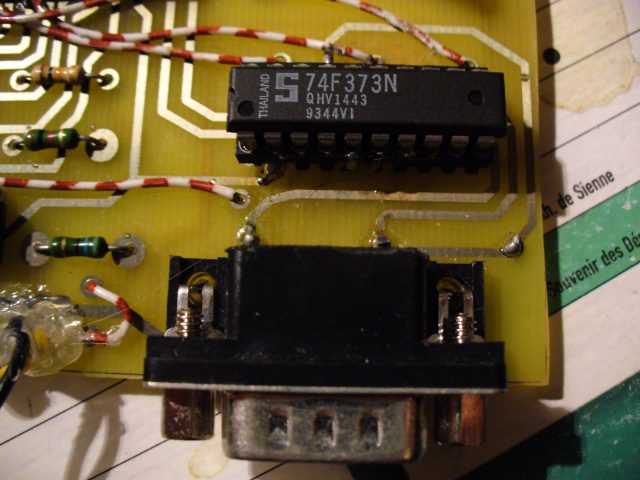
In the right order :
Audio : 2N2222 Transistor and LM324N ampli-op.
Alim : 7805 power regulator and the required capacitors, try to power the system with any source of current (values comprised between 5V-15V).
Cpu + Clock : The game machine brain.
Pads : Nothing egual a 74xx373 interface designed for AMIGA's and ATARI's game pads. Find them in your attic or at a secondhand trade.
Run fast to your favorite electronic store and buy all ! There is for aproximatively thirty euros (~ 35 us$) !
Back to the home
Be carefull : this site is under construction !